You are using an out of date browser. It may not display this or other websites correctly.
You should upgrade or use an alternative browser.
You should upgrade or use an alternative browser.
Willie’s Last Aquarium Build
- Thread starter Turkeysammich
- Start date
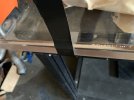
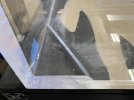
They should all be the same at least if he cut like that probably cut on different sides of the lines mixing it up on pieces sucks !! Another trip down for trimmingYeah I meant the person that cut them probably measured 24" before cutting the new batch and didn't factor in blade width
That's what I'm thinking...They should all be the same at least if he cut like that probably cut on different sides of the lines mixing it up on pieces sucks !! Another trip down for trimming
You still using them or returning?Man I can’t catch a break. I asked for 24” in height. They to fire their operator. Helen Keller could have cut it closer.
I started building already before I noticed it. So I chopped it down with my table saw. Not perfect but hopefully passable, plus I’m tired of talking to them. Already had like 20 phone calls just to get to this point. I emailed them and asked for a discount.You still using them or returning?
Weld on 4. And maybe 16. Honestly I can’t smell anything. Some seams are meh. Anyone got any recommendations. Thinking about adding armor seams. Gonna go to tap plastics and ask.Which product are you using Weld-on/ Scigrip- #4,#16,#45 ?
That methylene chloride has such a healthy smell Im sure your respirated up!
Can’t wait till your first hot tub dip!
1 inch by 1 inch square solid strip welded along the inside horizontal/ vertical corners would definitely add alota strength to the build not sure if necessary though.. Glass uses alot thinner material but a square chunk along the seem can be feesable with acrylic with better results
I think I’m gonna do this. Maybe not 1” but something.1 inch by 1 inch square solid strip welded along the inside horizontal/ vertical corners would definitely add alota strength to the build not sure if necessary though.. Glass uses alot thinner material but a square chunk along the seem can be feesable with acrylic with better results
I’ve done the pin method on smaller projects. Since this was such a large project. It pin method would have taken too long to pull them all out. So I opted for the capillary method. Anyhoo. I’ll over come it. I always do.What I learned from a YouTube diy is place pings between your joints and apply glue wait for few seconds for the glue to dissolve the joint surface, and pull pins to compress all your joint for final result
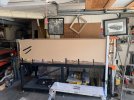
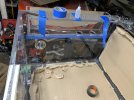
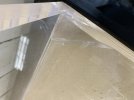
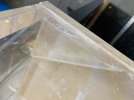
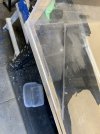
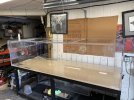
Put the front panel on. And some of the euro bracing. the capillary action did not work in certain places. I’ll do the armor brace in those areas.
If someone has other ideas. I would love to hear about it.
If someone has other ideas. I would love to hear about it.
Attachments
Last edited:
Kensington Reefer
Supporting Member
Three Stooges.....!!!
The Ultimate in slapstick comedy. They are beyond gangster.Three Stooges.....!!!
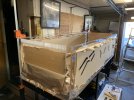
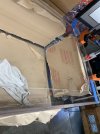
Euro brace completed. Overflow box completed.
Cross brace ? Yay or Nay ??? I prefer the open look. But cross bracing might be more practical. And us old folks like practical.
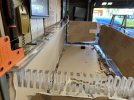
Oh also routered edges it square. I routered a little it wasn’t super smooth. Anyone got ideas or tricks. Guild me.
Cross brace ? Yay or Nay ??? I prefer the open look. But cross bracing might be more practical. And us old folks like practical.
Oh also routered edges it square. I routered a little it wasn’t super smooth. Anyone got ideas or tricks. Guild me.
Attachments
Last edited:
Reefinglens
Supporting Member
Looking good!!
At 8ft, I vote yes on the cross brace
At 8ft, I vote yes on the cross brace
Thanks for the advice OG. This is the kinda input I need.Looking good!!
At 8ft, I vote yes on the cross brace
Kensington Reefer
Supporting Member
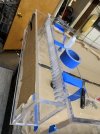
As much as I hate them
It’s probably a good idea,,,structurally
It’s probably a good idea,,,structurally
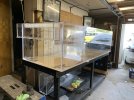
YO THE MONSTER IS BORN !!! Corner armor is in. Cross braces in. All done. Except Polishing. Water test mid week.
Attachments
Last edited: