Reef nutrition

Ashburn’s 50g frag tank

ashburn2k

Supporting Member
Since I'm hooked to collecting different nems and looking down is PITA on the RSR170 so I decided to shut it down and search for a lowboy style frag tank.
Only this time I don't want a lowboy due to it's low quality and bad silicon joint at the corner, thin glass ( easy to crack if you put pressure on the pvc pipe at the drain/return holes.

I did thought about getting or DIY a arcylic frag tank but I kept my hope high to find a proper tank.

and lo behold @Arvin R showed me his hidden gem that he almost forgot.
IMG_6585.JPG

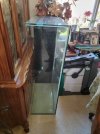
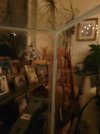
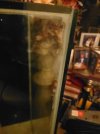
The tank was the perfect size and thick 3/4 glass. but upon getting it, the silicon job on the tank was done poorly and rough.
378250181_896986335094621_1867684648249790249_n.jpg377499188_1123347865309401_8479874432176229194_n.jpg377122148_197990039857908_3507574417927125282_n.jpg

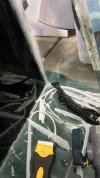
So I had to clean them up and redo the silicon with black one
IMG_6592.jpeg

getting ready for the new silicon, and I had to build a new stand for the tank.
IMG_6598.jpeg

and it wasn't pretty, the tape didn't work, it came right off when I was applying the silicon, so i had to take them all off and eye balling the job on the fly and clean them up with blade later.

IMG_6601.jpeg


tbc
 
Last edited:
silicon jobs all cleaned up
IMG_6620.jpeg

So next come my 3d printed complements

first i made a simple overflow that doesn't take a lot of space by designing a slope at bottom but without a proper holes to test with it was hard. so I went ahead drill the main 2" drain hole so i can see the placement better with buldhead in place and found out the slope was rather hard for me to screw in the thread.

first sample
IMG_6605.jpeg

which i found out that without top brace, those teeth is going to fail.

here comes to version 2
IMG_6631.jpeg


it's improvement from last design, also deeper so i can fit in the bulkhead without being stuck.

IMG_6632.jpeg


2 1 1/2 drain holes, external box is 3d printed as well.

after painting the stand and i went ahead finish drill out remaining return holes and early plumbing fitment test.
IMG_6668.jpeg

oh yeah, the sump is in place, i went with a custom made one without baffles, which i'm going to add them myself with silicon. the though behind this is, if I take this tank down, I can still reuse the sump as another frag tank by taking out the baffles.

379630203_1241513496749886_403214308730473126_n-1.jpg
 
batch printing some frag racks while I get busy with the plumbing. this design allows me place my frags freely and I can mix small and larger frag plugs
383493872_261232466889758_5769434305310035143_n.jpg


385437557_134767606360949_5065013722914321583_n.jpg


during the process, @SupraSaltyReefer suggested coast to coast overflow and it turned out to be a great idea! I was planing on using two return pumps for maximum flow.
IMG_6671.jpeg

with full set of frag racks in place.
385443936_713545930692556_8678564020929461370_n.jpg

return nozzle and 3d printed adapter for the locs to pvc
385475224_802453238298608_6008278244272362632_n.jpg

external plumbing almost done.
IMG_6675.jpeg


now onto internal plumbing ( i kinda messed up the return by positing them tooo damn close to the edge.
IMG_6676.jpeg
 
the first water leak test was a disaster, external overflow box was leaking everywhere where the bulkhead is. and one of the coupling was leaking as well ( the o ring inside was missing ), so some silicon glue later, it was all good and running without any leaks. this photo was a little extreme, I was testing to see if my coast to coast overflow can take on 2 pumps pushing water 100%. this was done while tank was unleveled, the other side had more than 1.5 inches to spare.
384171108_1508289793278940_659080594941859467_n.jpg

as you can see, ( maybe not ) i've place a gyre pump under the frag rack so nothing will settle at the bottom and gets pushed to the other end onto overflow.
IMG_6689.jpeg


boom! tank is in place and i mounted my lights too. right now it's little bare and def need to add more corals.
IMG_6695.jpeg
IMG_6696.jpeg


I've made a chaeto box to be placed in return chamber.
IMG_6717.jpeg

made a bigger sectional nem basket so I can house more down the road, 2 more baskets coming.
IMG_6762.jpeg

they are shallow, also lets lights in, so i can still place corals under the baskets.
IMG_6765.jpeg
 
this is how the basket is hanging onto the tank
IMG_6766.jpeg

and the final result.
IMG_6770.jpeg

i added a few shelfs on the wall to put stuff, also a drain pipe to outside. I kinda wish i actually drilled the tank at the bottom so I can add a drain hole to outside instead of current situation.
IMG_6787.jpeg


now onto sump tank, more frags can be placed here, and ap700 used for the sump grow out when needed.
IMG_6788.jpeg

look down shot.
IMG_6791.jpeg
 
How are you going to supply nutrients? Gonna have any fish anywhere?
Also, how do you keep many different nems? Seems like a point of problems for many people
 
How are you going to supply nutrients? Gonna have any fish anywhere?
Also, how do you keep many different nems? Seems like a point of problems for many people
I have several fishes and updated livestock list. As for the nems I’ve made cages for them that prevents them touching each other, a lot of carbon bags gets replaced weekly.
 
Last edited:
Current fish list

4x cardinals
Copper band butterfly
Dotted fox face
4 fire shrimp
Cleaner shrimp
Coral band shrimp
Possum wrasse
6 line wrasse
Tomato clown
Storm clown
Scopas tang
 
Last edited:
Back
Top