got ethical husbandry?

My 150 gallon build journey

nanoguy

Supporting Member
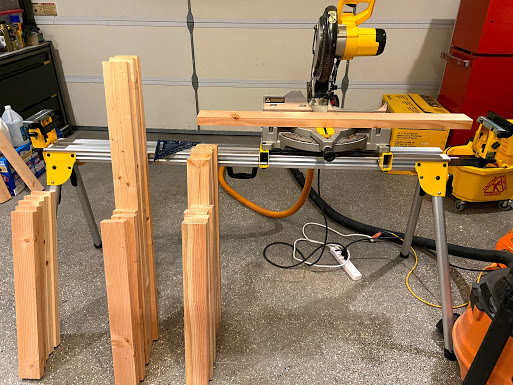
Hello all! I'm just getting back into the hobby after a very long break and wanted to share my build journey with all my fellow local reefer nuts! The decision was made to get back into the hobby a few months back when I came across a used 150 gallon Crystal Dynamics Tank on CL and decided to move on it. The tank measures 48x30x24, euro-braced with low iron glass, and equipped with a 16" Synergy shadow overflow. I purchased the stand along with the tank but decided to go a different route so I gave it away and decided to build my own. I did some research and came across some aquarium stand build videos on YT and decided to go with a 2x4 stand because it provides an undeniably sturdy structure for the tank to sit on, 2x4's are super easy to work with, and it's very friendly on the wallet ;). I'm not going to go into all the details of the stand build (tons of videos on YT on that) but wanted to focus more on the mistakes I made along the way and provide some nifty tips that I came across that some may find useful. I started off by cutting all the pieces that I needed for the stand before assembly. Having a chop saw with a stop makes the job much faster and gives you more precision with your cuts but your standard miter box will also work if you don't have access to the power tools. *****DON'T make the same mistake I made and purchase regular 2x4's! Make sure you purchase "kiln dried" 2x4's. It's usually marked with a "k" on the tag/description and is around a $1 or so more then the regular ones. I had no idea 2x4's came kiln dried until a buddy told me about it. Not using the kiln dried ones caused some issues that I will get into later.

0sVHTxog2xYKmV_O2oP87A3V7tO7QQmsLCsRo5REALHFUO63tvqdcMPZIVWZe9HBI_i2jersWaM0i9FxTY-bwpWHZzWsKPLgQAFLDY_VmPs8WxNJMOixlLR4cHB0sfg5hn10mlZ-kgIhAXaXdG1glB378WDeKmEjJoUM2vou7jWAqcnMsDsHE4Mgc3SAffUw_qIxp2j5no0dGEeUim_Q8gfky3OVICqBb5Mnr68byWc1fiXjMuRklAJGv7S8pcjRvTo7BM5pliU0cMaFDomsOBnYX764_0Mwzvf36QjA139qWXuBLTUYx4wunHIfSUjJONqqtfGXCo5DEV3rQiNOKdl_slmh5AvBbfWdLe9ZWU_PdbtJ2MAIq5IDWqBCyelZxPEgxEibNSETCYItUvHml2I03DJCpKTOz9grRTiqI-SGaWJDufkOiWcBnl2YDNgiJWZ8cvbxXTeWcR9t7qT30ELloOT1Atjvn_gk-eBd_uRNI5SIsU_foGxLpSZffX_Rh2ogxdPyPYgTs5V-G28_KWJZD_TY833pUIfm-ea_xfDtN5vvaMxkGTN1wd1VWpKq5jSWpx4Fq3t69SAqnoW_2mdwjKnL-6FRWIbCgjP7Y7n46LVUoB8CKaeLMTwrc0pvOezY02F88j0DGc7eXgAAzS9-PXa67TzF-NSoTyna-IC-R74R3B0ZS9g=w513-h385-no


Assembly was pretty straight forward...screw, check square, rinse and repeat. The total assembly time with cutting took me around 1.5 hours. Along with the screws, I also applied wood glue to the surfaces that made contact with one another. You don't need the glue but I had it on hand so why not.
gHV_yz97uoO-o5oLo9tRmHIh0RD3g1mHL-rGlkH2LMnjWWMOdqcrzfLt0UGx_DCz62w6OvsMuSluN-QkFh9OTJEXK47cqJQnrqSk-2EaSU9vNbdgjPFg2e9B-i7njql-qsw2uVAjKJW7FgCqsmDUDFabqRwNV7L5qdEJ5Nc95TcslWeQiQ8j4_iFc83nUYrG7TiI_H6QKLoEsza5l9MRX8cMnVeL8fth-xqXm_AHJg7wPuWQ7tVO89JTKYmQWbZX76i5YHSROSo_AEwE1CZfVBetDcr7RJeIwSiQe-L0IWXzxo3tVnWxC6cKQ88pXdCFKzHiT3RUxgYjbxo6ePY-3_-su7HN7KSfI76GgbYctejm6D7oolRXUaS5JZ4X_lINJhcx-4EHiQ_Xy015gBcg6hDlrqu3YwQGmYuNDVxe_808FMEcMscLJBIQFDb1XPcJYpjC1IYumah2CWIU6NWUTw_ayjdw8RrKD3hilFKfCuEVjppQEFhYjnjA2zdAwEM3874IiIsYRHiDfs35oattiJwn45jxiwd_F76O8_2Ac7exgusiJoCJlZQjju-LW9Hh86X2a2Y64_BWRpE8K0Td3Xbhaa8Zn_f6WUoOcQ3pTb2uF0ql7JoDezk2dpIykkneOo3-LCHLph7X2NSZDHqBYnzoIEFhE_71j-yI4o1gQBKmt2YxbLBEvi4=w600-h800-no

IwdJTAxu_vA-zOk_9TVtecbyA5cfinfKTp58IpxZmMz5Lyy96j_my8RBQIDZos0O0ipG_nqq3wLCrD1RLqsi0ryeP9W5PNSQL1BmcMk0xk-7FrcG9vGu1osT-yfcO1upsxBehhSDgSCfxwDVz1DRTBV0mlzSlP2UKGmZ3UpS1jGSPek1Y9id_m1QMCldtYiY6whiGwVwh8-vMw8nLvsvrB_NuLfqs0k1Ytabh6rwdfEsqxyjLATUbRely2gzGtB2ZmcrsOLb1T8Vkrh1FrYCqlTtBZcL81o4zKjp7Dviq6D2H_cbAF1QihOUdGrhtRfz0GYx0Dh6Pg6B1nmX-PE5DeFH3j31a-KHSHZeSkQdvJawU4hsw-AvRSIanpNe5sk9Qqf5yqajEIiTCqPDbQGxS_1bfbUArDRvzNrkMER0-9Ra6ObYV35fUCYjzYOWoPVAYJZmQ2oWsnPbhZ5qTtsVCfi9Y5Xuojy4P5QL3djTgKZmI_WdGYw1IeHCt09D52YmljtLw2LJrgScvCiI5MsyOrIKfT5kFlA5rf2X1JwZs0uPOi1UBeu15N5sagtXANm7Jg9RpW2FPQqnqlRbaZhd9-S-7XmJ34N3StUFOOxf3iuyj-dJa0_9uh7w-FnASNOWFkcm-dthl1kWQK7Pe9bDMgdViiuj6A8vyRlSPBUiWaGPqlcxuI1QLu4=w600-h800-no

RXU_ZvrrWhH7E0N7_3qNW_svhyisiCPkw2oPyfUr-FiO-o_haxzwGKeTl2i03ScNvgs6je5eVPsROKMzZ7OxNMI5iIx4ICxmfV4ETcw3e1c10rp1osAhGEjEWg72IZR8GOSb9aMmo-auHELi928D7BmkA8n-lkrSt_x0MAXjShHHZc2F4LOUBSf2sUdoOlGRvATdRD6R19VzQm63oei6KE_vIPbPXVY7QsrqQ94Yw9dm40WmIZ35oycp6Oj0F5K3jmTu3819xtLQze_9lgW9GoDnMBOItQQJA7qRuEhWsyCeLjh8PrVtd5ZvuQCW-cmCg0dYYHluzbk6vZdlWNDe8rdp8ku7xXp_4gJL8iJZ1Cf4Sa6Nd_RxV88rtY9MMHc03dqcMa5xlodI3xyvh8kqqvceN6lpi5hT2v_4nrK57KZZjx3vH7Qw0X58QYqO3RN-OFpsxc36pDJb1l2Tg4vdQtiS7Bmq3fbdLEU4cI2aMWgp-Kx-CBAhSJ4t7r4X5bYMnRwCGtj7sCfBdmd0snICzHq7kQ2eODosuyu4a_kTlMHWLAHj4XgysxtYFLLuf4wwmJv4MpZ1NYgljhguXm4OZn3Z-bMb96MNniEcbtSw3K78tgbUp1_r863Vxf5EU_XCEBGxU-PkKJHLA40Qi_yJ41-PB7vbd05N6JnNkS2z5cruOQL1xWsrCZI=w600-h800-no


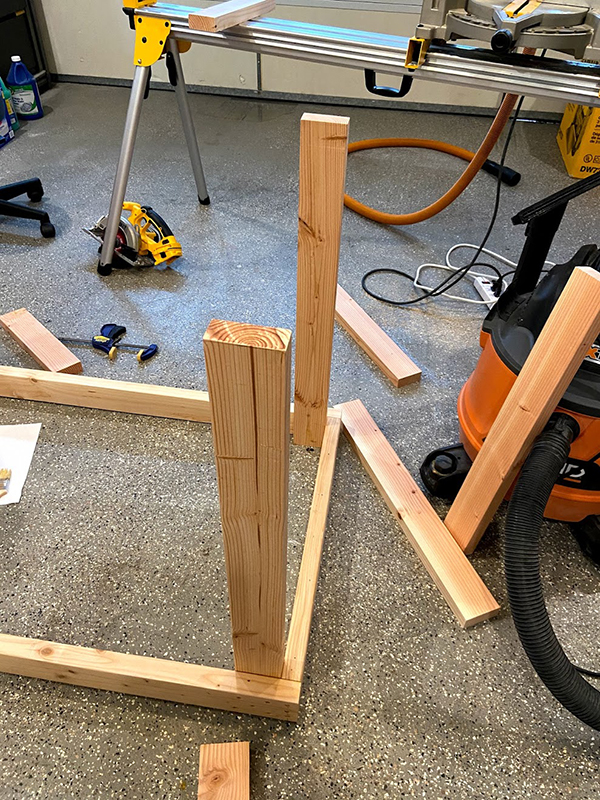
The wood glue between the pieces tend to make the pieces glide on one another while trying to screw them together so the use of a clamp keeps it from moving
mIUPQcGsjI2yf_wJXS_y3JrU_BMi8ELfjyOJtutfUEg0nrq2mx2SQzudpBmBTn359_yJ-lM5UoQctH-Yg4EnIUyt-Qlc3XJhDfTZNRh-0eTk9xsHImyVbf3fULCs8AliLY_TBxK_WN_HphWi4XIWpdfDPsIgtrHsmObO_sQaYm0_ZNDLQ4Kev7IRRtTbJLCt0FqObNhZZaOPD9n5vwUPToitsYk1-eYbON0ia2F-zoiwfU44pieRqGjHSq7tWV14yPKC8MH21iQ1JfAu2ZdgM1bmUpAASYJNnPlCZsfU6A0hFuW918srqTyh_XFG4VuU83QpLXrKrQOvALoJrTq5jmhpkqAJ7QTMvg74lsy2-gGhMYUqGku9e4KQFIGorWbR8RYYNbaeXGR9pYeuet0gx7DQMp3Tvx4-r5dx6kbftdJ87sfm8pl9winL2benGz9P6y6fMV7l9efOQMlJ92BFhU00DJRzhmUh8nUzPbG6mglSA395b9P_5Epd9Vohm6I3C3M9BHJQ4K35HG3LV0DtKmJ_9oTb7hiRaTOtdOHdDcRT4hWQ2hSsv43AxJbG42mJ9WWg5eae0EUye-fV7livmxScYpkAuHpwRqlhmDSeMG2j_JTV3zzh_99BkrA1KLp8IRg5vC7-qox5EDGAflvrZD5SQpcRMPTFKFrRuCgJOVnFpNFGPFH7tao=w600-h800-no


Here is the stand all assembled
y1sXgtLnx4iYhybxlOxdGnx6Rv83t81zv2Zxm_vrzucbhBTB5Aru1Hl4BK2xbmiMP3U84wMb662h6Pg6weHSVRL6jKRKG1jY-og9fc0oH1--QR69Nvbr9yVsgPuesY-vceVGkByW2jzv_WpBOiqA-uD8hyZpdpSe62erzyesRtDIebkagaZ-9V51y16_EBIBI4ZRB-oQ07oslAkIGAi0lEd1rjYy6HSeLyepzczWfpTruPmnAYvshlkVHjuh398ZV86GBEJajD36v3L18I2wDcyJhuwVW3t18VzNvZJCw0J3-SrdwHTcHl2hv8W7cuHLNn0WyzocisZjjVx_qJxgOOFujVY_vAvJLGo7UM0MCqKXYG3NatAQAcgTPnQGChbWx1xUecT9auK-4mtUD5sdDbEvurO7l2u8pvgwRzrRVgBMndKXptoXzNjGMygcvi7v_vuOcNIsIbpSFQAG_wpWD9xfTPXEjEsvkY4L-G44yNZmgSz8p-N74HKsNph_-Noc3mNCfUatEsb6Lu-3v8lGdzuebcX3DQyYHQvLfZkeQx3lVOddB48Q6pyoNL1vi-BhPtC7pgvyUIDQxTHf5Rcjk09cRg1XCVU9cPiwPQH1zCT2uz6ikRAFQBJU0edccCnnwZURpn8Z0IhthKCUpgtnqqx0H9-YRuvGB1bCYNukhePtxRK72OSWp3k=w800-h600-no


I used a light weight body filler I picked up at O'reilly auto parts (U-POL Fantastic) to fill in the screws and any imperfections I noticed in the 2x4's. I think it was around $20 for a almost a gallon of it. It's easy to work with and sands easily with a electric palm sander. I don't recommend using general purpose BONDO. That stuff is hard to sand!
jxM18lPIRC2JZVuVTrulqQpfk4LyUvcTWGX8GmBP5tdI5w2PrRJbzhguoaK8YcmdhCMtISzO_3F0UbNpW1XrbWcXFAlOM4UbGFk76xAUXzJrp1Klz8tTYnB1n4FFXrbcY6bqpvJu3UMufFauExcjCveWdR0PXi62PLn9LE-max2VKk78xyj5gvZyzE6Xje00ZiGvt6q0KTLjHcUVZpJ0jULiofKNqWvO35RBQQ25I20SX_fweysK-jXQCG0yT1GdZ1dA6FTXYl0dKRr9-VxNE0hXrkWcEzV6rtGaesYimd4OhNDiV9CGu23LlOGVnEQztYGy5jmRBe5DgYHNe25kUGj_4eJzsAHtRlJagzeyFbUSLIlEhVxk_HMGJnla9amS1xDJHL178UcY6MN502YFrZfWXvpti4pttAlgREUWU0ZntFvXfCbrVtgYs2klBOebb2KqNvEGHzWZigwtZiUJTHlsfxo07drP1iMiXRm7qnCh4HcgsMcC0C-36cUoY0ADkB9EG3vq077oOLWmxnpRixoDw8DAHxGymoXeHbIHrJdkUEzSnaTgQErjoXsfqlL3l5owiRzJgy2JR02kkL5wgPHC-_Nor9LWM6o6B3da4W8oR3pZ8qYZqBAMpYxKwBYSR0VFFcNWggettg45LJzavCTEhNui-Wdri2JJoDfui6EcMCMJMv7BN1c=w600-h800-no


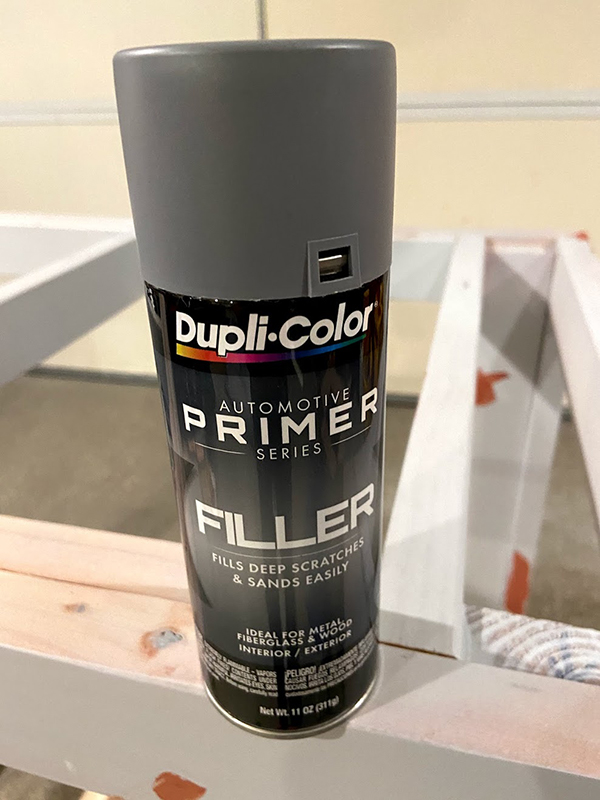
I used Dupli-Color automotive paints in a can for the finish. Years ago, I built a stand and a buddy of mine that owns a body shop painted it for me. The finish was super durable so I decided to go the same route here but went the rattle can route. Here is the stand primed with it. After the primer, I filled in any missed spots with 3m Glazing Putty...those are the red patches you see in the pic.
p91Sxbk8jrafm_-U21mAKAVGLf4mww1tE4I6HqDHRay4gjKsiSo8wBDJDusF1qe3R9CAvun_ZgePJ44vOAJkpEiTocbiYNaiPAF1QdjbCK9hsteMFLWldMgef8HwYYCyHiP281kpnpG1_V5KpaBbMk6-Yopn3G-SiDgjsjy7yXJxa5rKSwZuREUr6HbSUlMKRVe4MI9h39cadBDroUaUVRBoMWhwjiaV0m_WwXITtUex7JuaQKY13f-8kWBpgk8FD-YYbi5JtBkR0w9zJkNEUY1jAQR_ZEfnUqL-TQlTq8SP0wRUM72xbyqn71VzBvYmLCTjLDmLZRDcY78JDU6iPQFrkkp53AQQy_FATcePh9Nsp0Zl_Q2KqK2vMjvkYHmbefEUynTFO5zOYzWi_BehvgNzbI5tXMWLdvRUjCL1EhC2GMNSn35sN-RY2MvrU4VSw9uCi4w51y4xZ_lUbXfhQMSYUh7BF-xRWxx0f-36-XnRypi6B81XpBVgjlJ2llC-mUfJhrLHMxr4PlLylI9PofDpef_72YEBriFPzV7YLw8l45Ocb2cEO4QjUHiRLI41rNhpqm9UOGnOnmVOo4iqqUDtp1Lz-LS0ZaGwnhVbfHpW7bRkL8x6TRJ2_qWCdo5bcrtGNuWR7YA3dUvDhq6kD6IBESoQTu5qwK9ZizivlTf-lrmlDpbr490=w600-h800-no


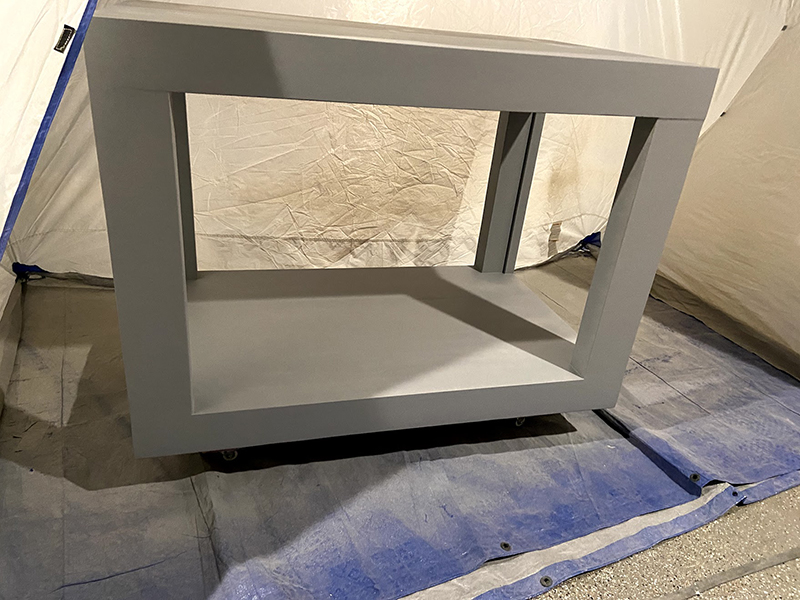
The first coat of primer was white. I recommend using gray instead as it shows the imperfections better. Here is a pic of the final primer coat
2umuMIBTcvX4gwwh16UFCI15KPjs1U_N6c1T0M_AhZs1cMHaLL6VGZ2A_gDysUpcClJcsyuRu6bW8yuUPLdLnFjtLm6sME5LY0InXuvPQRDBZeAB0Ln4g1g5QuMAqVttN_HF-O0fDOlyYF_bIZFw2wZ5GWeaXdHzOk4HgLxJ_yacAQhwa-1XJ_lYRsTcYDqTuHkHpTxnr9ZM-f8ybePwCPH9e0XTK54taro3hRq2q3muOBJIFXOL3zWavbkuRE0J-a83LjP1gn2lB30yb-dhTEjspfmfoXthNvcsZrDKaCGkuyWWnzm1Z7QHCPInOWFsguEeLPG-LYW6_PTec-jDvGr4YM2P25-fLojqLLj98fq8gxZOckgp8Muy09y0h33Vzo4F0JzxvPWMH6TVLYUlAvicvoLEHmwGPxkOP0WqfrFtLtpF6lN6RBMPPxDjYcuOQGiNVrTatXrokUvE1xYn6zbVFesGu3W5WD2xvYB7xWghwZ88nzBvyK_lF7InTlJRlZsfQXfREweT41YFBlHISO2yUyXiBuoj-fNeufY5ScfHJaImB9FV9A8GYwQC5D31-1nfb0xuQKeMp5m6TtjPsCgWG5_tuy1uSxSf0_FOXDpZ9hFeYpBHwswPRB6r2Ky9H5pwqG_8PvjK4rV3tNIL8qFs0SkkHwYyEkVVGOJxDCSDVdo3h6_rsbc=w800-h600-no

pFIfY6MG1p7LAr29HiluYcYgNvCYBvZQDYhNtBFHyQJ05YfBI8HRJWSlwRqVcPE2Qpw6lS_y8bV0Aaqx930yjsRBJbDvFfYcFg2Kb_wD914EAFqJCTiKQFqCrNlWBTGOyZ6yI1zyGbCyJ8iMWo-jDkn1swhxW9nVVtDLPs4thrj8jY3KbYt8YuHMqNim2sWeLU-aQIdjdTvp3yxd-OAkGZ0JD9kGKaq7ZBqGCfm6gvWJqQZ8qWJmcQdOFKb5bM-h47STpvkvl0jsqTi_r1sDxqWTGPGy0olNtLAZyT6e74U2Hvj36pGse0s9_q-K2Re1wfDtvCqB1rAc6dniKsugENa2Ch4GagcjQpP9YMaovow0O74pVKzljpn-vxVdST6PQCtAjpeiHbGGf6O5-6WAhSd8NaBjp5fqri5xEE7qcTihO8y-CflPDDGc_zKnkL5JSQ1QYfMEx7_DT-I0AxV3tZzr_kHw7RwYl_Guq0r3TUfOo2PoYK1PkW68us7PD4G18Tr5S8NyZahGKXzOhCAjPBx9WsKcQaRMc5uxRTtyX0RXFDp61YuOjGafjJoFrR597sdW3bRlBVHQJYUrLTHrWTg6cRuv73OvRIKRL5RpuebNyFjsf06UYY3ND6kHhWbUzCUxFNgOEo8VDBqXBtya70M1g0AINz_Vv0nO_T7VS2Puh_pqYsYqjjI=w600-h800-no


I wanted removable panels for easy access and installed magnets I purchased on amazon to hold the doors in place. Here I'm test fitting my panels on the stand and trying to figure out the placement of the magnets. One thing to note, the placement of the magnets have to be directly aligned with one another on the door and the stand. They will center themselves every time with barely any wiggle room. If the magnets are not aligned, your doors will not align properly so prefect alignment of the magnets is a must! I achieved this by taking a small drill bit and drilled through my door and into the stand to mark its location. This left a small on hole on both where I later used a forstner bit to drill out the hole for the magnet placement. I then filled in the small hole on the face of the panel with body filler...not a big deal for me since I was going to paint it anyway. Make sure to label your panels (front left door, left side, etc) so they match the magnet placement on the stand. I applied Gorilla Glue two part epoxy to the underside of the magnets to hold them in place along with the screws it came with for attachment. The screws are pretty small and the magnets are strong! I wanted to make sure they don't come off when removing the panels. ***NOTE*** The magnets I purchased (4 boxes total) all had different polarities! I found out the hard way and ended up pulling more then half of them off and reinstalling new ones since most of them broke when trying to remove them.

9gJFcclJqobYx1j-jfuXhWJXqLuhHtSET3cf1qpH4oCyjsHHnZym7tW4HVGJpvXJglwbPC6_i2UiSfwtyjA2sqEpPfSNSTh4T0DvUkOJNBK4r22_Ib-T0z-pyEdauSTcNHOVeFdSPGtTYJSb75f46TEh_M7B7MlagxtHlhipDgnCBCaqJqNw0eRjxFZK9PJg0Duv_50WPvOMgpktQB03Ts_lIRvCFmrxJ1uLNdKS35R8txbO6vwsb_W8SL8uYwTVtwR5TO2BlvsylSEyAQFVHrfAkNlrgG2eFzX9zdZRhAF6tKsSrHMfi1aH8UQ4_G4mx6QWe6gL-NmDZIDt08yQqo-PH-xjynx0AaXbA77qrRAgLNcEfeFAzQ8Bg7ub2P1d60zoBAiWoHdxzv7L8XnTzLxdJ2mpM6YOpOrdFm-aoS-V2D3O3LdrMBP0gmhGFTGsUxCv_KRrnXIUCIoHE7iMxdAEBqKNsEAP38mdL5uVRtQgjgO3d7IACmTFMzM33Tu8fQLPlUyV6zceaWBKfBzd24im3zaUQBashp2zVulrwQ5ULC5qPLhgjSl5qZ3yAmJ7IWupPDH_4T5vRh92AtxlZLq5_Oj2Z0jGGggfWzv4KOupzj5VFp3gwQj2Z0_9PG7-6mGZZXMFaJss6IEzzcMC36xmfxANQrGMtP406CHYMaAIiXAKe3Dl3WE=w600-h800-no


6oOLNoCpfUNoS5UnIueIOhy7MAg5cjxf9AYXCqviOyR1sORwNGPJGqUhotmEKVY8f_P6iE9ge-FhPQBQ2_9fKR0xXfg1jVf8gGrowYShCAZ36_4QfLwhJqCOo9T52HyTQHLVFNFY8o928_dXrTBEBHu0xUuNKNkpAwI-bAuEUM3Gj-q9grRNlJGA4hn-jt89R4cuiW45jCbZHXupALNNTRA2XgNriqwGjkDHlP1S2YCI__u0Ic1BxaR5oQ2jcDuijAU--xCHAgVelSQ6JwoqaZhH1tJTBwnhfE3IUcECskZZp1N0Hyxj6k4aTGp1YlotojizuxsmMa34LpKDYsEb_lId6-E-WVnDm2TLAdV24SDCvgLINpWIecmRlPLglgNNrCA-GL6WZ_P361haFjrszatbsTEg1P0E_9nIAT2kIFGvoR-2XuVA3kaReh8vfood6Kk-GsZs2bZGZrQxZnWScx7aS2sQZAfOtGoCioEqGTdDGIm-nnWCcTg4du50tnxhAPB7FO1AanE-3B7_f7294FrrtwEtyb6Prf5ccSrKUe55OMY6XCWeT5UA3nVZkcQSNZ-QmTkj91yYirhcoYaoWRe2MsTC5yQNs2cJs2cvjcFRsDnPn8GxG9U1tTjHK3pssZkuZHM0IivgR65UCmZQlRlK6BYYP1Nry5hWWzokYmbWxiYX7Z4WlZw=w600-h800-no


2VOeUt3HVcYpjlvwOUx4eN4TkA1eQYBU49ToY2gHGyGOR8fLXKJXCq8Pbo_cyMmq9m_Gati6XnjMWGwwWWNwjtdzPW6nesRl0fVzYjiNasa9jU52kFy7Q7P_veTPbiXijtpWCCdR9mfHfQ9Yvg5gFERDZzD_Jfx4ILNYr-iVWXmgkfdzAz3Osd9BZVy2SPU0dbLliO15JqwCiAwYZ-IGt26TssKPboggzFD1XvdtWPnMouT9OnroMxgBia-NpibJfCorPiSsI3q3k3hkOrGVvwS-BQG777BN0LGRaF0sMiJ2hY84wbU1dIU9WJR3gaE41cFZnlmZflnV4eaOo0ASp2CCyC7OfSrUo2f4f7PNlZGscWn3RvF62wxja6fUOCROYR8b_OSKyQFzRU9Zitv3S_sqA484OkBfzoK6xjzwysjjB44aO5u-PlD9GY5xigDmKklmskTGfm20Sa9QCvKPtVBmOhF00t8wU0iRXqI-8C9p9lWAUtANKbwX1hXDuXAeJf2KjPmkV8uPiDN44QV6ulRRjvfalugY_mGkArWGoVaoul5XSUh1NXCLHgnHF6B-mc4-BGbctGkOV3xqKeCHqlgxeToLcEV-nEagV2BKFYAvOdguLNw_83KV1KX4D1w46vFRToKCi9wkS-cfQC9cU5lAbMfM6QKYSrpOFHHmtA1bPRnwgoD2978=w600-h800-no


B0oWa_O-YLegBtzkqI6037KPR-6Qe3aGeegPUZmIqhkkOOK1VAIzjXxNW1pLIHz6jd_ZeJNIsuacKJD58bmaXtY3sS24CjFS2TsLq7uWICaQQy4b8clkOiCWI1ymOXKwMjeRTI3vu-8ag2Q9EkYVijrGl2uKs19kO7B5kx5j0uVOIASI9vsuPNASslFkoG4wLmHqs0Zosm-9sygTHJedqTJyvcxYQzp9vB_p12mcRTwo2UbresmHlPR_vbIHw4fv7Maz2voz61wZ0Y5m1s1uuWLlKnwD2_iY8WPifUpi-pEGXjCHWehWTxL6aIvT_DyjTfEvKsFWe7aSMO7bWxHSJog85PN5KBzUOlDCPKo31vvy91gR-CEgN6u7XblVQZWb7ELsz2FK1p7IXVjBZGBHXfCmbjQuz3GmZEd8Kf9-4xnJH97FqpWMhtc0HXQLqjIUNjLl9gorOI1aMCQIVMpI4WBR0AJeA8jmjmFplszeD-a8EyTf2qT541Ix3jlT-qG74Mg2QyhladXavssQuXq98aqOlFk6cKCA-PhXyZay1cqImCYkIbGDa9IDBRlG1y7Unri9BlnY9x4A3UetLM6tCHIrJqpxjuJc3SWjWXDLOq38FK0xNFISLmHDZB_5Lfi_lVH0GzkvCI_dI5vEIPO9IX9nYJuMVBNH1lcz3s0o_Wqh2u1-dViVuY0=w600-h800-no


I wasn't planning on covering up the magnets with filler but had to since removing the magnets with the wrong polarity really did a number on the stand. It ultimately gave me a cleaner look, but I would've installed the magnets right after stand assembly if I was planning on covering them up. I had to use the body filler, sand and primer again...what a pain that was. Here are the results with the final coat of paint and leds installed.
ciZ4zfOj3r8MXBgMa1kXJ56EGNn7E234TWA2IQQ0NlSD4KYEtJpXVyfc_lvhPtrFv8XgcVhnDbRwhjdScXJOPO14e9XKXezHG20FYka7tVYxt1w4CBLM_VyZ3FX5Aqwm1IIx95Hrpi_Omfh8nU-eC96bsVOhmYaTFRYnm3KC6yaASz-j9lO-koOL3d6t_AnG_um8ge_Bv5EK1KU2TDYaTd9H_VOi69rooRztFoTy3oIe76qooD6tCAmzRIN2gzNR-kNbbeWGW91T5n9fPE2elz9gKsEEi5gItMvP0YF4uxa69WsFE0UsKOr6GQEG8TAjGxB_Wj09RYA0UsCy9b67PkUiaoSCLW_oK0x9e1NleFhqXHL_qzob1UMzyvqJK0eyRMtg849vVKZjQ80uCT44jSqLBafmCMaR4UQ1lCEAnn0PCyyjeBtmLaoqhIUnQstcBLWFyxtqS-8F4dS48qAQKnye4c_iV8efEUR462IrUHjFrL6LDsblZaxtHA1xhEC9p8virYbsmrAB1sedDIQxnoZfdQs2JoSXT2rO2Xf3To-7bcSiilMrktEQ7a1gsBR-kDc7usI4v8BLdD8mu8IJqVojxvHnAwFBgaiCTy1NOvE1PjDnpPnK9QmBogeJ9j4QP2ekr4FAgex7N-K40_OLFgWGq1hvTSW4qSYNdPp9GQOv2oVFtIBXvnc=w600-h800-no


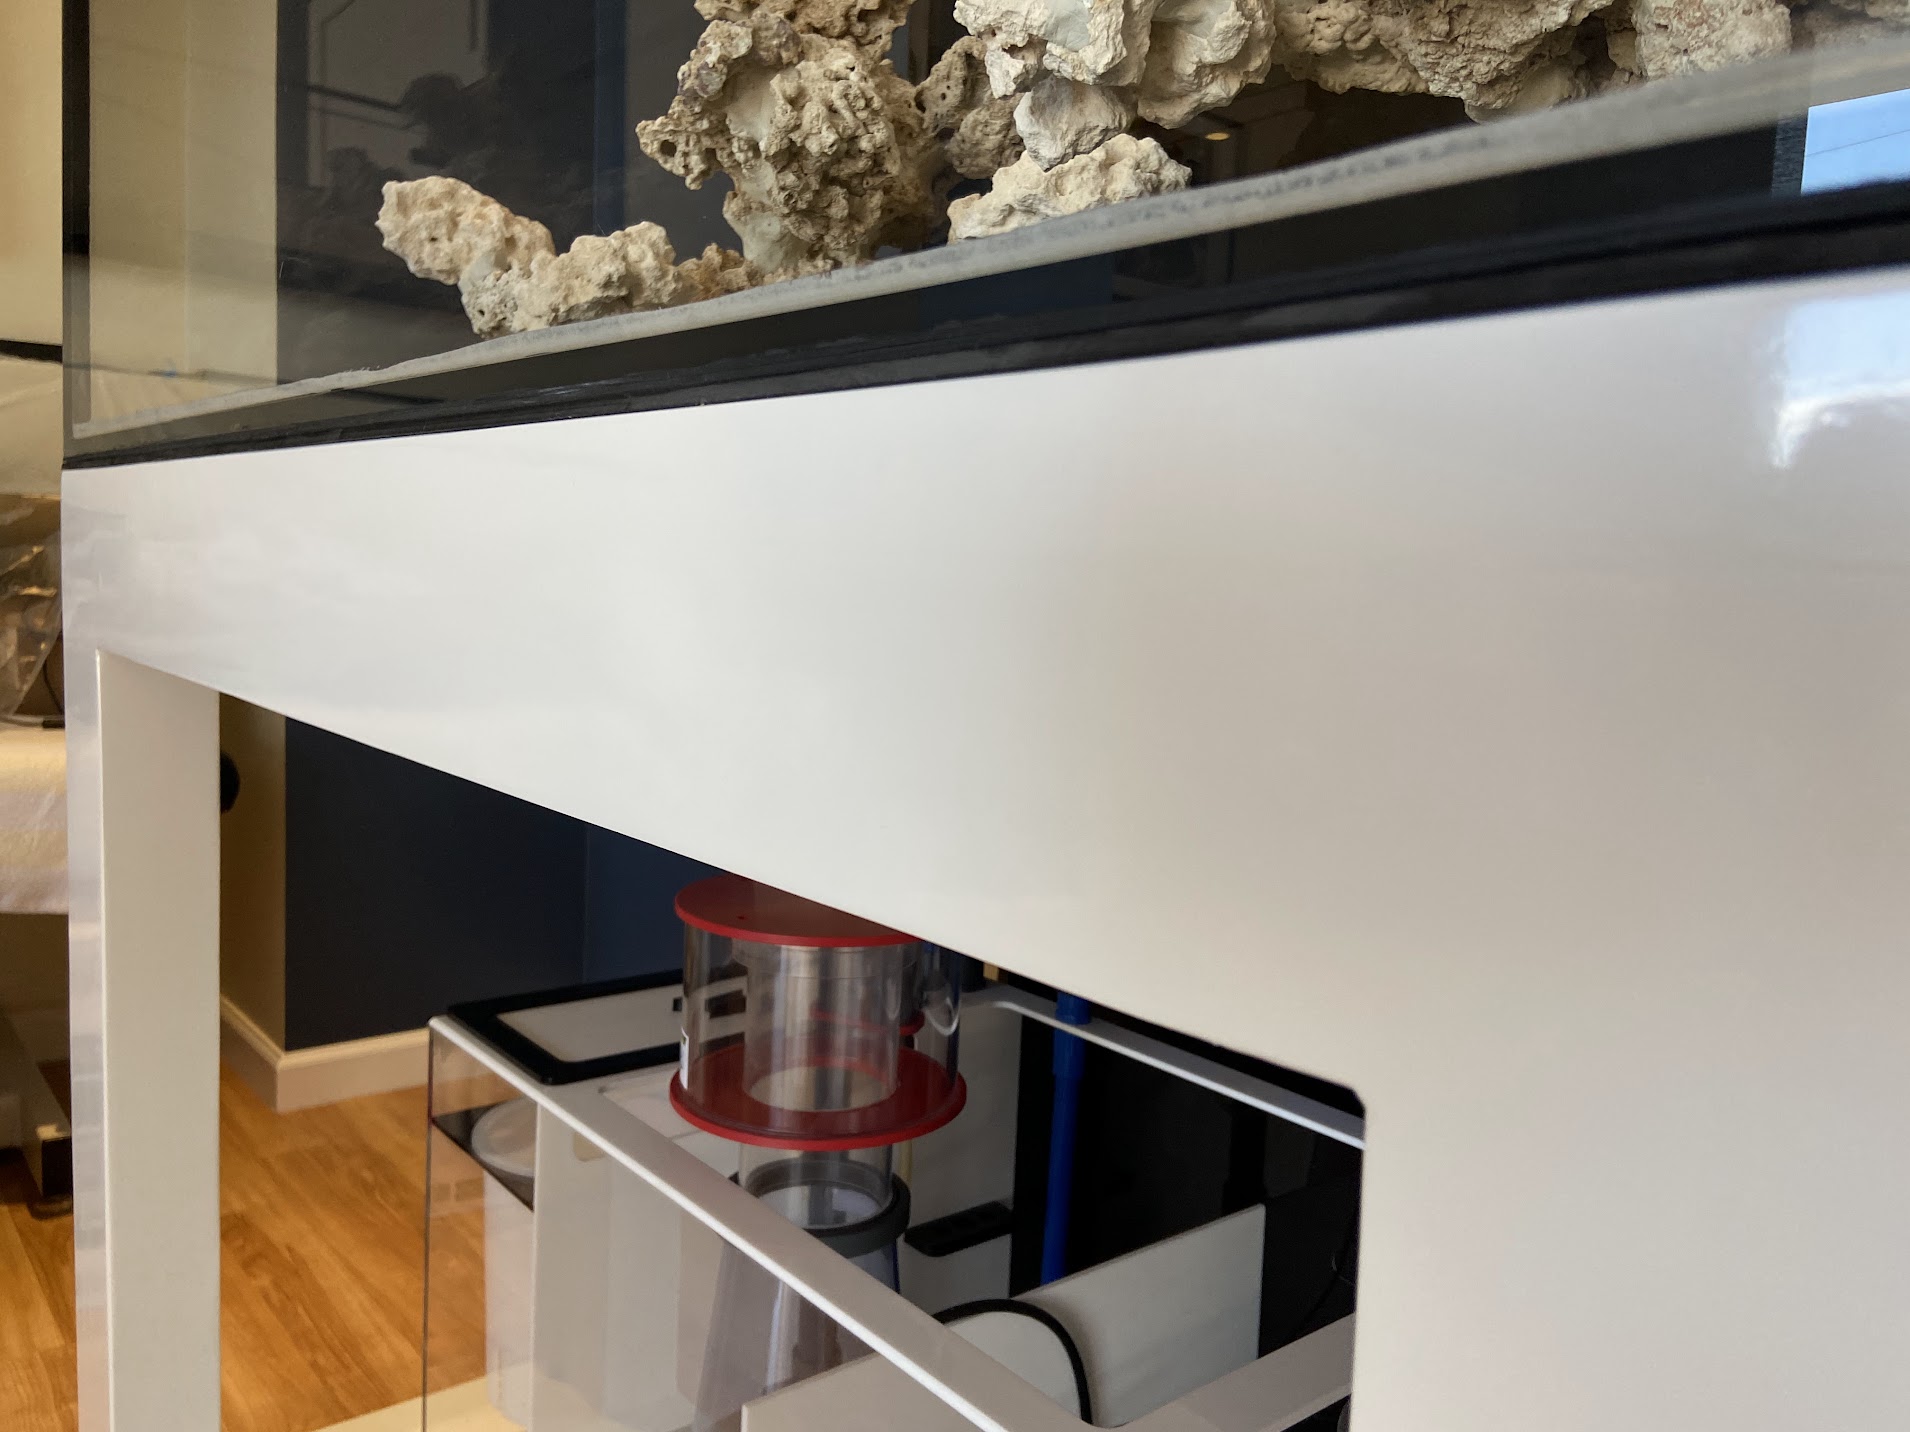
I anxiously waited 3 days for my buddy to come over to help me lift this tank onto the stand. The day finally came...I was giddy with joy...haha.
WrTvyALABlXc3IxzudVxYCFHZ2HdQXK4kOt6aOiNz362nxlzF-FD2nEGm1AhF2A3g8QZ70RaEGk3XgoQ3C7VktsOpiy7i4_Fns7J-GnmsXQKw6OdOQmZsjaaCh5JPyIBC44CXjQUbIMsLBy9jhLoBlUrs8w0xhvDJxQ-3mqZ3GYeNKxO3Q7rs0fx-5ydgW1BU0-YN-NB5wXfn7wMhItCAe8SYOoUNycyjS3TKmi5OKsSto_OvHpwQlk6OyOeTASY5rrP64Ztk-VHk1p3L8GnqwQNyWmN-5o5FRo5SPxe6e_nfFuRWIxXChTvnd-fOKXmJRaDorau-RHF2rPQEjNzL78o37YQpLqVtBQygo4LkKhtxBLQus5hP6ce1nhtNy2QsctzTmZAYRx9f94PaFof5axpxR5yzUJdTQHYbPPBWUZgKs4fR9zbQrqXORn_QX2vOD1QHp-7vT8UEKnkSAm_E2BhLKZl0uphBdn9YTLoe0QBWBNx6ThRVhYv3JgU_P4UjckiDnppXeKN219J2LymhmqmP0pJlCmO6VJz6n4IyoXfPYKu1MmaZPJ7URFS8fwcfmXSF86uaROsh1mYdsbjydiRekPmyPStomJhqJK1l9Rd1H9-YMjvGgjvRpToAq8tqpw9aHUL7DBwm9V-94K1BYYbZBUN4Jv8wDQfyiyMubVwLxj2lxrNQK4=w600-h800-no


The next morning I noticed something was terribly wrong! WTF! It's getting late...time for bed...I'll post more later today.
 
Welcome back to the hobby, Your screen name sounds very familiar. Your pictures aren’t showing up, or maybe it’s my “device” either way, it sounds like you’re on your way to a great tank build. Keep it simple & have fun
 
Thanks everyone...feels great to be back in the hobby. V...no leveling feet needed and you'll see why with my next post.
 
Ok...on with the build documentary. So the next day after a bit of gawking at the setup, I noticed that the front left corner and the rear right corner of the tank was not touching the top of the stand! Called up my buddy again to help move the tank off the stand...not fun...it's heavy. After some investigating, I found that there was a slight twist in the stand! This probably occurred when I was assembling it in the garage. I checked the garage floor with a 6 ft level and found the area where I was doing the assembling was not flat...UGH! Long story short, make sure you do your assembly on a verified flat surface! Doesn't have to be leveled, but should be flat. I came up with several fixes for this issue and decided on just using leveling cement...more work...more hassle...sigh. I used some scrap material I had laying around, built a form around the stand, siliconed the inside edges, mixed and poured in approximately a 1/4" worth.
ACtC-3ehrP_0S5pZIYO8qKi0g_uFhdqOi-5IwlKNp7_KnYvDY1AbpU_wJyxADcMW8lMzaHdubYf9YCplbKAGTzlbpsZKK_60RPbyw8h0Mye_6knpzDFTQjGirm7odUeZnLaNZQJMYuOBhMocTCqft7AiDnVZ=w800-h600-no


I removed the form the next day not knowing how it would turn out. I was pleased with the results
ACtC-3d7uWPnFPsqD5y2Ak8dN152Jwh6zUORRdC8qMDqaS4S5ODyEK780LT3w5HSnpl6MqG2SdoyqnnHA4mqEJeyXBXa2jlcA05IY6dB_EHw4GYjuFRgm8HyRuk0wNbszJsKkIISiBGrdNIPklpjaHm8iIg4=w694-h546-no


I scraped out the caulking between the concrete and top of the stand. I did some light sanding to flatten out the top of the cement and to soften up the edges. There will be a slight "lip curl" on the top of the concrete where it meets the form. A palm sander with 80 grit sand paper took care of this with ease since the cement was not fully cured. I wasn't happy with seeing the layer of concrete...so more filler, more sanding, more primer, and more paint...sigh. I originally used dupli-color automotive paint but decided to just go with some Krylon Fusion for this last repair. I was very happy with the Krylon paint results. The paint sprayed well , can easily produce a nice wet coat unlike the dupli-color, and was much cheaper! I sprayed a total of 4 coats for the final repair. I wet sanded the 3rd coat with 600 grit wet/dry automotive sand paper (let the coat cure for 24 hours prior to sanding). I waited about a week before sanding my last coat. I wet sanded the final coat with 2000 grit to even out the sheen. The over spray from the rattle can will make some areas look more flat then others...just lightly sand the entire project until the "sheen" looks the same across all the surfaces. I finished it off by buffing with an automotive "heavy cut" polishing compound (Meguiar's Polishing compound). Sanding will flatten out the paint but the polish will bring the sheen right back. (TIP) Soak your rattle cans in some hot tap water for around 10-15minutes to warm it up. This will decrease the viscosity of the paint allowing it to flow better out of the can and the increase in air pressure = better atomiziing of the paint = smoother finish. I just took this picture of the setup as it sits today. The stand is perfectly flat and the tank is resting on the entire bottom. As you can see, no visible concrete layer. I purchased the Innovative Marine leveling mat for safety measures...probably not needed. The tank has a starboard bottom...that's what you see above the mat.
ACtC-3cuSL_igV8X4sscdNnP_bR2D12EDkIGhUdEYyy2Bdp8W5IGfvod8zsYEkZPzLVYZJjZsf9_GbaVZBVx_ue5tUSyy0a9nCUr30xHXlzO1gyAIVN5EMUM9zlDdDc7oqHTbJJ2Wyrwz2l_WVnRPPiU7gs0=w1910-h1432-no
 
Looks very nice.
Leveling cement was a good fix. Helps waterproof things as well.

The only concern : You seem to lack sheer supports in case of an earthquake.
That tank will weigh about 1,500 pounds when all done.
I see a lot of screws and beefy joints, so it might not be a problem though.
I tend to encourage people to test it when empty.

+1 on that not being a Nano.
(If you become a supporting member, it is possible to change your username if you as the webmaster nicely)
Supporting member taken care of . The SN Nanoguy has been with me since the very beginning...not sure if I can let it go...lol
 
I just got back in as well. I have a tank set up at the office. Waiting to stock it, waiting on my clearview lid. The stand is looking really good.
Nice! I thought about setting one up at the office but I'll never get work done...seriously...no joke.
 
Rewind a bit from the last pic...here is the completed plumbing. This was my first time hard plumbing a tank.. I experienced some serious sticker shock when it came to the cost of the parts...not cheap.
I strongly suggest using some big box store PVC pipes to do the test fitting. It's cheap and will save you the headache of having to order more pipes when you screw up...trust me on this. Loosely fit the "test" pipes into the fittings and run it to where you "think" will work for you. You don't need to press it all the way... it will be difficult to remove if you do...just enough to hold it in place. Once everything is in place and you are happy with the results, measure the length of the actual pipe (the length of the pipe between the the two connections) and add the depth of the each connector to that measurement for the final cut (union, T's, elbows, etc). I used a straightened out paper clip to get the exact depth of each type of connector on my setup...just stick the paperclip in the connector up to the little stop groove inside and measure the paper clip. With my 1" unions/elbows, the average depth of each was just a tad over 1"...write this down for reference...it will come in handy. Take the length of the measured pipe and add the measurements from the connections (x2...one for each side)...time to cut the good stuff and glue it in place. Make sure to push it in as far as you can, give it a slight twist, and hold it there for at least 15-20 seconds for the glue to set...if you don't, the pipe and connector will slowly start to separate as the PVC starts to expand in the connector. I suggest ordering more fittings/pipes then you think you need. It sucks having to order more when you're short and having to wait for the delivery. You can always return what you don't use. By the way, use clear PVC glue and Primer. I had to order the clear primer online but the clear glue is readily available at the big box stores.

***HOT TIP*** You can actually remove glued in PVC/connectors. This will require the use of a heat gun and some aluminum foil. Search YT...tons of videos on how to do it. I had to do this a hand full of times. You will have to cut a new pipe but can save the connections.

ACtC-3d7DXmmuQXHNhsYjdxqNTWwYoM10yitHD5VYyqunrlNp6ehWO_NQFTX25mej8-pfp-A4VXL59Kx8lkLClptBRxX78JtiXChXmFyUeLf7doG9fs4efZoTGaAGoFEr61OugTFebzzTLUagrJrgL8BEgcW=w600-h800-no


ACtC-3dsJqzEWKw8iBB5oE-FfW-iCK__8_DQ3-ZEY8EOA646t1s--tzskvUZhZZIC-welsAdduytKqGV-VgVSbRxJXyBJErL4vpvUIzDVBO1PL59ydcT9Srzu1fNWciHxmzwzsYfsXTK4YO5AFEZF4H-BmYu=w600-h800-no


ACtC-3fPLhxbJaab1vkr1J63qdKYLQmP_0JRnGukL42E88sciRRTLb2O8v7I6nKFv1ye49Q2SN93k8lJ05lHXKS1YwBuO0uGn7rwBMGeU9Ilx4LRYJuk6pt5Gf9FWT3qQw_3FQfmHPqfQzewPy4y4VhMVw8i=w800-h600-no
 
Here are some pics of the aquascape when I was working on it in my garage. I marked off the dimensions of my tank on my work surface...helps with visualizing the layout. Keep a tape measure handy to measure the height...make sure you account the growth of your corals. It's good to have an idea of what you want to grow and placement as you are piecing it together. I had a hand full of rocks from my previous setup but not enough so I purchased 25lbs of dry Marco rocks from MarineDepot...chiseled it up and started piecing them together. I used some super glue I purchased on Amazon and some underwater two part putty. I had a bottle of super glue accelerator laying around so I didn't need to purchase that. The stuff is not that cheap for such a small bottle but it really helps with the task at hand. I read that mixing baking soda and water has the same effect. Maybe someone can chime in on this. I pieced together my aquascape in two sections...gotta make sure I can lift it into the tank.

ACtC-3fKYpwybtRjMiPcWa_SNM9U5YpIW229Th9F5JMO_04bpBEPN5VhLaVo0sO5YUz2Ajdzv0ASvb2VXQRVQ2IIp-mDD9t-PNMAinZxq8hV01iAJGngl3DDPjBe89smoEWKNzXvTi4IfhDIrbqcUD1d_GAb=w900-h675-no


ACtC-3eyn67blfxdaA9x30THEN4Lqjk53fq9ZLTgctt-IcfHNIFD2_lcp8xpH1kFEfy_l2EW8D0e4e2AlGzRBm06XsV6tW-9veziq8v7OtfjpNxAjRanzZsx5dfoXILj4C3MDAzprupniriAHlWzoNQNt-MN=w800-h474-no


ACtC-3dFJMnG4Xt6KPnujDdW1rsFhUYaUHjUWiwkFaY6uduqb33Yx1qyOddXhth82OB_6J0ieQ68wdD7Z_wg-sbaSKBN8Ga31NeIShaJPx14c0uINV4al3K0Ne2o4BnnJFakmAdU9j1BYhoW8g_zuvt46-TC=w800-h570-no


ACtC-3d-tEmHEiBAxmZNY3zCYuXvjElruG5nBDD0YFvmrcDN90VDBSKwrIgGmTQGfHg669MEtw4F11Q84EVHuHfG5mci9uW3YDwxAKzO_IDCwFAFSDoxH5J9kQen18Vn7KcFeNZCVI7N3mMtrWcWsXKwD6EW=w990-h1318-no


ACtC-3d_KR93razdQYj6xQOCAaoU9GsARjEij06JbXtTjPZY25628xiaDjjJyq7suENiemCjHY9Zu6tZGEmrSqfADM9m4M9IEhuRUpmXFikUCbqB43uiwqM3TabbVnxzNI-ykwDuSelmDGJVmP4sDKjqEzah=w1000-h750-no
 
Curious what’s going between the stand and your floor, if anything. i chose nothing and will be replacing that area of my floor when I move. I have a box of flooring in storage. Had I to do it over, however ...

Also curious what’s on the other side of that wall behind the tank, or under the floor, and if you’re adding a fish room, water stations, and the like.
 
Back
Top