Cali Kid Corals

New member (me) Jim

I am tickled pink by the mock-up tank complete with fish stickers. That is a very nice freshwater tank, but I want to see photos of it overgrown like a jungle. ;) Just the other day I did a little trimming on my freshwater tank and noticed another new reed tetra that wasn't there before, the reed tetras have been busy.

Looking forward to seeing you at the upcoming meeting Jim!
 
Welcome and +1 for Gen at Kritter tanks.

He built my tank with an external overflow. Tank sits a bit further from the wall but there is nothing in the tank but an 18" slit!
 
Hey John,

Thanks for your comment. I checked out the Kritter Tanks web site, I will definitely give them a call.
I am not currently convinced that I totally need a sump, but it would be a convenience for heaters, top off, bioballs
additional algae etc. I am worried about making it quiet. I would like a very quiet system.

"I can stop anytime I want."
 
Quiet is easy to obtain for the overflow. Use a 'BeanAnimal' style overflow. There is an extensive thread about it on Reef Central and BA has his own website.

The noise I get is from the skimmer and return pump. The overflow itself is dead quiet.

You might not be able to add an external OF if the tank is bowed. Gen would know.

Congrats on joining our merry band of salty weirdos! :)
 
Super reef octopus skimmer w bubble blaster pump is super quiet, and so is the water blaster pump for return. Like John said w the wan animal style drain it is silent as well
 
Thank you all for the good advice!
It will take me awhile to process...
I am looking forward to the South Bay tank tour!
I should get a lot of ideas and info.
I am going to the meeting this weekend, hopefully I will see you all.
Jim
 
I have a short video of the BA overflow system on my build thread at:
http://www.bareefers.org/home/node/15370?page=1

If you are ever in the north bay feel free to come by and take a look/listen.
 
Hi John,

Dude, that overflow is perfect! (However, my garage is messier than yours...)

Even though I have read a lot on the web, at this point, I am still endless questions.

I don't know where to start in putting a system together.
At least, at this point, I know my tank size and I think I know what I want to put in it. (We will see after the tank tour.)
That is a good start.

The Kritter Cages web site sounds like they don't want to spend all their time helping the customer understand things and figure out what they
want and design it. They don't get paid for that. They want fixed plans to build from. Totally understandable. To help the customer out they
have a list of LFS's to get advice from. (almost all have closed, sigh...).

I actually think I could fabricate a BA overflow on to my tank (with advice from Tap plastics).
In either case how do I figure out the design? How wide to make the overflow? How to reinforce the tank. How large the siphons?
What pump should I use? Where do I get a sump?
All this needs to be sized to fit my tank, what I want to keep, and maybe my budget. : )

What did you do?
What sort of plans did you have for Kritter Cages?
How do I plan a system?

If anyone else is reading this, comments are welcome.
Hopefully I will get to the point where I can eventually help others...

Just another question out of curiosity, what type of screen do you have on your overflow? Is it slots or gutter screen?

Sorry to download on you.
I want to get to the fish part of the hobby.

I followed the thread you gave me.
Nice stand! Great workmanship.
It looks like you have just gotten to the beginning of the fish part.
Maybe I can catch up. : )

How far North Bay are you?
Maybe I will see you at the next meeting?

Thanks for your help, Jim
 
Have Gen make a sump for you and I'm sure he would be happy to make a coast to coast over flow for you. Three 1'5" drains should be plenty in a bean animal system (1 main/1 backup/1 emergency drain). Water blasters are quite pumos, but look into the dc pumps. Slotted teeth are what I have for the overflows, but to each his own. Gen made tops for my overflow boxes.

Keep firing away !
 
Lots of good questions, Jim. I'll try to answer them all!!

As a reminder, my tank is a standard 120G. 48x24x24

Gen is very easy to work with. The website does make it sound like he is wholesale and doesn't want direct customer contact. I didn't find this to be true. Perhaps gimmito will chime in here. I think he has a bit more experience dealing with Gen. Might even have him on speed dial? :)

I did lots of reading. Went thru the entire BA thread on RC and the concepts of a coast to coast overflow. From there I approached Gen with a SketchUp drawing of my concepts. We passed a few emails back and fourth coming to an agreement. Since BA and C-to-C are shown mostly with glass tanks, the structural differences had to be accommodated with acrylic. Gen felt the widest slot that would not compromise strength in 1/2" would be 18". There is a removable 'gutter guard' screen behind the opening.

In contrast to gimmito's response, I don't like teeth. They just break up the laminar flow and reduce the space available. There would be no way to implement them it this type of overflow, anyway. The concept with C-to-C is a very large overflow so a very thin film of water goes over. Since I reduced the size to only 18", I'm not sure I accomplished this. I look upon this as an excuse for another tank 'some day'. :)

Although I think DIY is great, getting advise from Tap about this is not how I would go. Their prices for acrylic are outrageous.

As to plans...
I wanted a turnover of about 500-600 GPH or 5x turnover per hour. To handle that the overflow plumbing had to be at least 1". One of the advantages of the BA full siphon is it's great capacity. In practice, with 1" plumbing I could easily have close to 1000 GPH. My main is closed down aprox. half.

I sized the overflow box large enough to handle the 1" Sch 80 bulkheads from Bulk Reef Supply. There are three drains, main (full siphon), open channel and emergency.

If you scaled that up to 1.5" drain plumbing you should be good to go.


I should be at the meeting Saturday. Trying to juggle it with a birthday party! If I don't see you there, I WILL be on the tank tour Sunday.

And by north bay, I mean Santa Rosa!!
 
Thanks for your comments!

I don't think I can use a coast to coast. I have an acrylic tank with Eurobracing, which amounts to a 5" lip all around the top of the tank.
(There is actually two top cutouts with a brace in the center.) This is a TruVu acrylic tank.
If I did a coast to coast I couldn't get into the top of the overflow box for cleaning because of the 5" wide structural lip.

John's tank has an external box glued to the back of the tank. I assumed this box was connected through a somehow screened long
horizontal slot cut in the back wall of the tank. I thought this slot was where the water actually overflowed into the BA overflow box.
I couldn't see the inside of the aquarium but I didn't think there was a coast to coast. His tank looked like it had plastic bracing on top
which would make any type of internal overflow box problematic.

Of course another likely possibility is that I didn't quite understand totally what you were saying in your post... : )

I think I need a "BA slot in the back of the tank with a external attached box" overflow.
 
On my old tank, I had a removable overflow. Not coast to coast, but wide, and
the same concept would work for coast to coast.

What you do:
Put two bulkheads in the back of the tank.
Make a full overflow box (5 sides, no top)
Glue short pieces of PVC into the back of the overflow box, one near each end.
The idea is that the PVC sections on the overflow box mate into the bulkheads
on the back of the tank. Push fit is fine.
To clean, simply turn off valves on drain lines, and pull out overflow box.

BTW: Keep fish/snails in mind. With a coast to coast, you need a cover of some type.
But the opening is thin.
 
I do need some help setting up my tank.

How about if I make a proposed setup and then
people can comment on it and point out any problems?

Here it is;

1) Tank;
220gallon TruVu acrylic tank
84" length x 20" front to back x 30" high

2) Tank contents;
Low density, easy fish
Lots of live rock and sand
Lots of macroalgae (no Caulepera)
Some inverts
Soft coral only

3) Proposed fish;
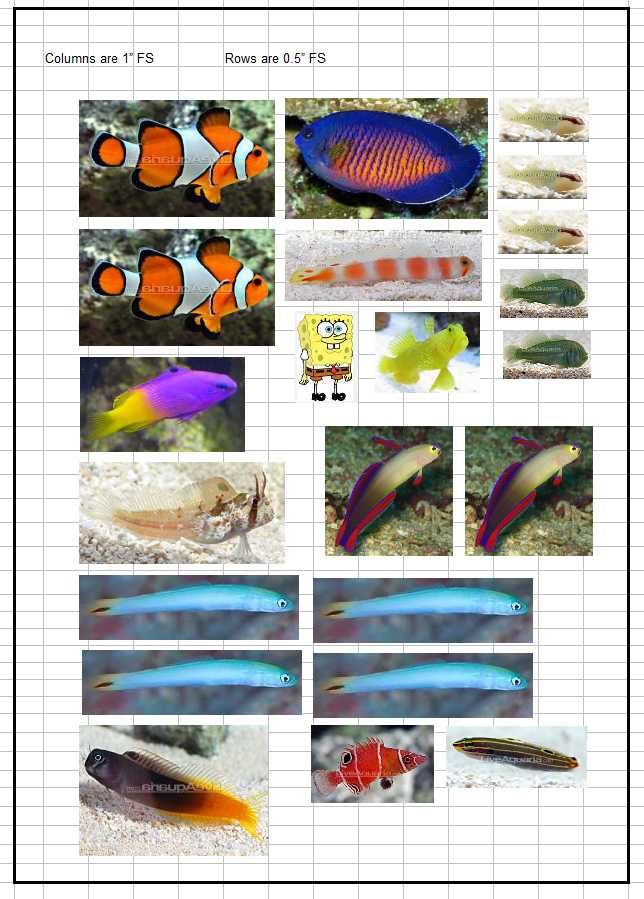


Technology;

4) Lighting 570 actual watts T5HO, 6 tubes wide, approx 3 watts per gallon
Should be good for Macroalgae and Soft Coral

5) Two 300 watt heaters

6) 55 gallon sump running at 40 gallons

7) 1200 gph sump return pump running at 1000 gph

8) External overflow box attached to the outside of the tank wall
16" overflow slot in tank wall
Three 1.5" hoses from the overflow box to the sump
1 - Emergency overflow hose
1 - Tuned hose with gate valve
1 - I'm not sure what it is for hose

9) Three part dosing for Calcium, Carbonate and Magnesium.
Should be OK for soft coral.

10) Wave maker in tank, not sure what type or size.

11) Protein skimmer in sump, not sure what type or size.

12) Acrylic tank covers.
Some sort of auto top off.

Well that's it.
What do people think?
 
Jim123 said:
I do need some help setting up my tank.

How about if I make a proposed setup and then
people can comment on it and point out any problems?

Here it is;

1) Tank;
220gallon TruVu acrylic tank
84" length x 20" front to back x 30" high

2) Tank contents;
Low density, easy fish
Lots of live rock and sand
Lots of macroalgae (no Caulepera)
Some inverts
Soft coral only

3) Proposed fish;


Technology;

4) Lighting 570 actual watts T5HO, 6 tubes wide, approx 3 watts per gallon
Should be good for Macroalgae and Soft Coral

5) Two 300 watt heaters

6) 55 gallon sump running at 40 gallons

7) 1200 gph sump return pump running at 1000 gph

8) External overflow box attached to the outside of the tank wall
16" overflow slot in tank wall
Three 1.5" hoses from the overflow box to the sump
1 - Emergency overflow hose
1 - Tuned hose with gate valve
1 - I'm not sure what it is for hose

9) Three part dosing for Calcium, Carbonate and Magnesium.
Should be OK for soft coral.

10) Wave maker in tank, not sure what type or size.

11) Protein skimmer in sump, not sure what type or size.

12) Acrylic tank covers.
Some sort of auto top off.

Well that's it.
What do people think?

Most of that looks fine.
I don't think you really need to dose Magnesium.
Consider LED. You do not need that much power, and they will pay
for themselves quickly.

But the 16 inch slot in the back of the tank scares me a bit.
That seems long enough to have an effect on the structure.
Suggest a few shorter slots, and an extra layer of acrylic around the slots for bracing.
Remember that there is 1600 pounds of water in that thing.
The pressure on the walls really adds up, and they flex.
A slot like that will add pressure points at the ends.
 
Jim, you got it right. There is a slot so water can flow to the external OF box. I'd take a pic for you but it's just black on black.

The big issue using this kind of OF on your tank is the thickness and strength of the existing acrylic. If it's undersized, as unfortunately most TruVu tanks are (I have had a couple of them), there is probably a bow in the back. I don't know if an external box could be securely attached at this point or if the tank would be strong enough to handle the slot. This is really a Kritter Tank call.

Your other option would be to put in a traditional internal overflow box and drill the bottom for bulkheads. If this can be done it would strengthen the tank.

Does Diver's Den carry the Sponge Bob Square Pants? :)
 
Hi Mark;

With regard to a removable overflow box that slips into bulkheads in the back of the aquarium,

I also thought about this idea.

My concern was that if the slip PVC to bulkhead connection came loose then it would flood the sump.
Also if the connection leaked even a very small amount, and the power went out, then again it would eventually
flood.

Unless I have it figured wrong, it seems a little risky.

It worked for you, the slip fitting must have been reliability water tight.
 
Sounds like a good start to a plan. I also say no t5 unless you are going to be using a fixture you already have. LEDs for sure. I do like to dose mag, why not if you have a three head dosing pump.
 
What Id do for the overflow box is buy an internal one from bulk reef supply. You can glue it in place, or, I would do it this way. Put two bulkheads through the overflow box and the back wall of tank. They then connect to unions that can be taken apart. If you want to remove overflow box you can disconnect plumbing and remove bulkheads and pull it out. This type of overflow box would be much smaller than a normal overflow in most tanks, and I really doubt you'd ever need to detach and clean the inside.
I've done it several times with plenty if success if you need help.
 
Jim123 said:
Hi Mark;

With regard to a removable overflow box that slips into bulkheads in the back of the aquarium,

I also thought about this idea.

My concern was that if the slip PVC to bulkhead connection came loose then it would flood the sump.
Also if the connection leaked even a very small amount, and the power went out, then again it would eventually
flood.

Unless I have it figured wrong, it seems a little risky.

It worked for you, the slip fitting must have been reliability water tight.

Yes, if it falls off, you are in trouble. Very possible if bumped hard while doing work in tank.
Leak would be so slow, not sure that would be an issue.
I had a big sump, and holes were really only about 3 inches below waterline,
so neither issues were really a problem in my case.
 
Back
Top