Welcome to BAR - the Bay Area's premier saltwater hobbyists hub!

24x48x16 Prop/Display

Past President
Joined
Nov 6, 2005
Messages
9,399
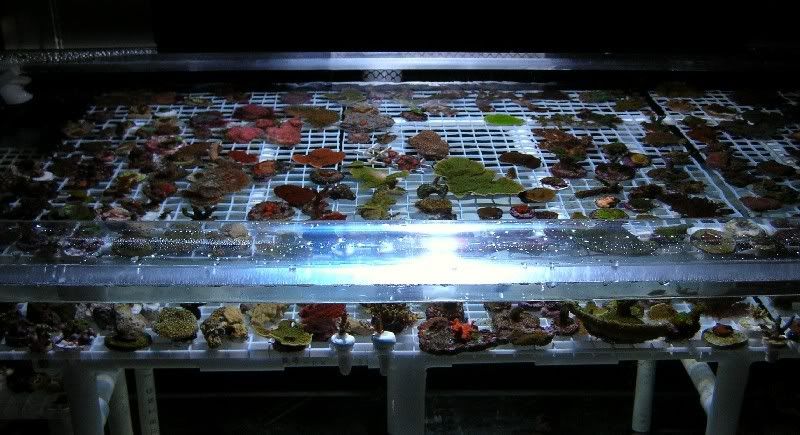
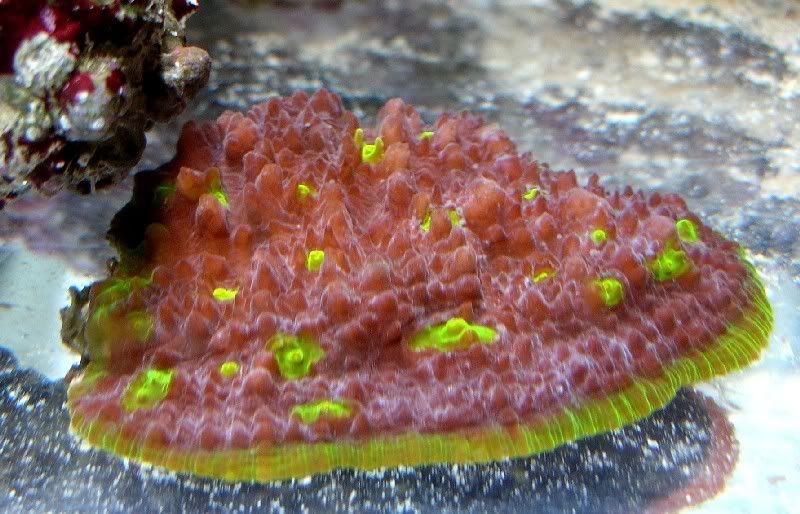
Here's a tank that I've been working on. It's to be a combination prop and display. For now, it's been swapped in place of my 40g prop tank which had run out of room. Got it up and running at 4am this morning.

This started out as a used 24x48x20 Tru Vu. I cut it down to 16" tall and eurobraced with 1/2" acrylic. I ran a round over bit around the inside and outside of the top to take off the sharp edge like how Tru Vu does on their prop tanks.

There were some decent scratches on the tank, and I tried polishing acrylic for the first time. Wasn't all that hard to do, and I was surprised by the results. I wet sanded with 2000, then 2500, and followed up with Novus 3, then Novus 2.

DSCN1652.jpg


DSCN1655.jpg


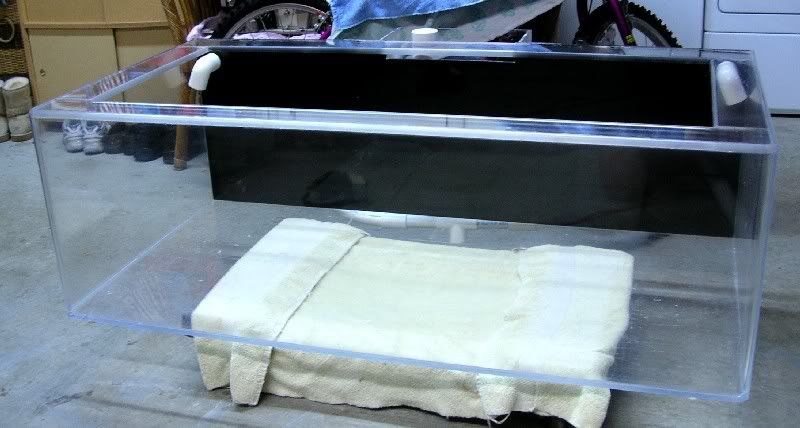
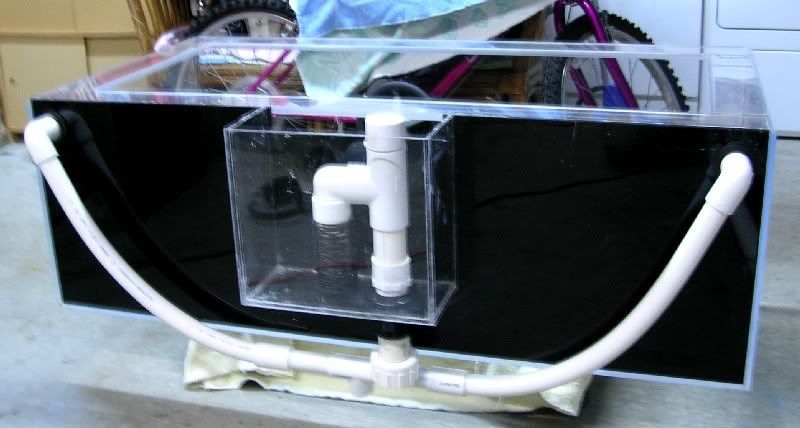
I took a quick and dirty approach to the mods because I wanted to get something running fast. If I were to do a real showpiece, I should have taken about 3 times longer to route all the glue surfaces and do a better polish job.
 
Guest
Joined
Nov 7, 2005
Messages
6,882
Wow.. Great job cleaning that up. You should post the before and after pics :D
 
Guest
Joined
Nov 7, 2005
Messages
3,600
That looks good Norman!

Okay, not just good, but GREAT!!!!
 
Supporting Member
Joined
Nov 7, 2005
Messages
17,384
I like how Norman mentions "if I wanted it to look really nice I would have spent more time..." *grumble grumble grumble*
 
Guest
Joined
May 22, 2006
Messages
1,383
Looks nice, especially without the center brace.
 
BOD
BOD
Joined
Feb 7, 2009
Messages
2,327
wow.. great work! :D

looking forward to seeing it running in person ;D, as well as how the scratch removal did.. i've been thinking about doing some scratch removal for my acyrlic tank..
 
Guest
Joined
Nov 29, 2006
Messages
215
Man, super sweet work Norman. Wish you had a before and after pics to share with the class.

Good Job Dude!
 
Supporting Member
Joined
Nov 9, 2005
Messages
1,158
norm. how did you get the chop down to 16" so close? were there any gaps when you glues the top on.
 
Past President
Joined
Nov 6, 2005
Messages
9,399
Chris,

I just used a skilsaw with a teflon coated carbide tipped 40t blade. Makes nice smooth cuts.

I did the cut free hand, but I have a lot of practice. It can help to use a guide.

The nicest way would be to rough cut, then do a cleanup pass with a router and guide. Use a carbide side cutter in conventional milling direction rather than climb milling. Use an air hose or vacuum to clear the chips if you are a perfectionist :D Then that joint will be all ready for gluing.

On this tank, I actually didn't glue the tops pieces on top, but I inset them to the inside of the top, then flush trimmed the saw cut edges. The joints are in tension, rather than shear, but I figured they would be okay with all the surface area from the 1/2 inch acrylic eurobraces.
 
Guest
Joined
Nov 7, 2005
Messages
6,882
You need to post more pics Norman :D ..
 
Guest
Joined
Nov 7, 2005
Messages
3,600
[quote author=sfsuphysics link=topic=2051.msg20417#msg20417 date=1179931379]
so what's the coffee filter for on the left side?

[/quote]

Ahhh....that's exactly what I was going to post. Mike beat me to the punch.

So what is the coffee filter for?
 
Past President
Joined
Nov 6, 2005
Messages
9,399
The rack on the left side will be coming out. Didn't have time to rearrange that stuff yet.

The coffee filter contains a bunch of rubble left over from slicing rocks for frag mounts. I have some stressed out loose yumas in there recovering and hopefully attaching.

I'm going to do another coffee filter for micromussa frags. That way, I can kill the return pump and target feed the micros without having their food blow all over the tank.

I use to have deli containers for miscellaneous zoas and mushrooms, but they don't allow good circulation, and they collect lots of crap.
 
Top