You are using an out of date browser. It may not display this or other websites correctly.
You should upgrade or use an alternative browser.
You should upgrade or use an alternative browser.
Pixel's 65 Gallon
- Thread starter pixelpixi
- Start date
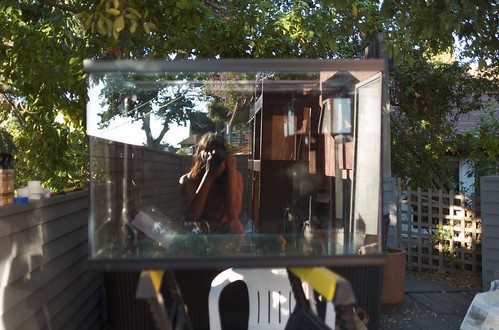
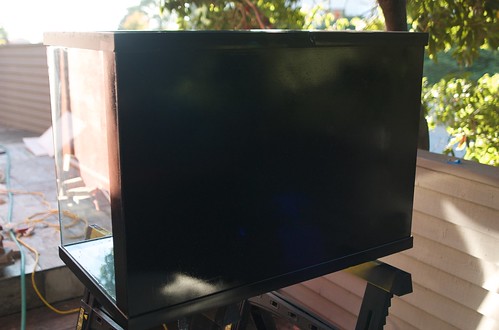
I got the back of the tank painted, built the overflow box, assembled the plumbing, painted the plumbing, and installed the overflow/return. The overflow is back acrylic and has two drain lines. One is .75" and is lower in the overflow box. The other is 1.5" and is higher up. The .75" drain will have a gate valve on it.
I don't like having exposed plumbing in the tank but I was able to route the plumbing pretty close to the corners and everything's black, so I think it'll be alright.
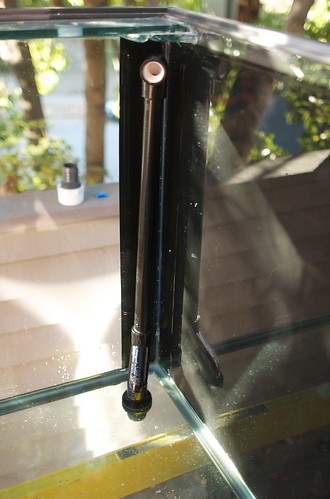
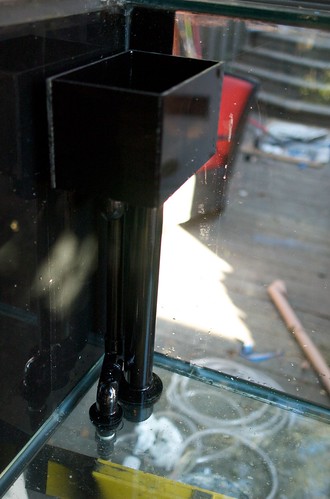
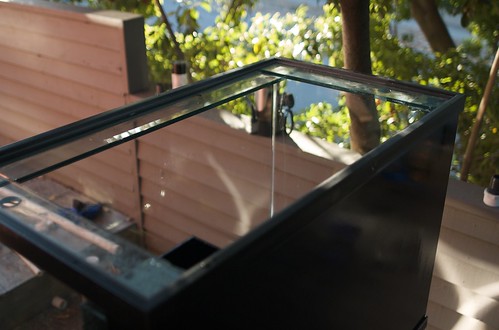
The return ended up being a bit crooked. I may redo it.
I don't like having exposed plumbing in the tank but I was able to route the plumbing pretty close to the corners and everything's black, so I think it'll be alright.


The return ended up being a bit crooked. I may redo it.
Nope. It was already braced.
Actually, I removed a brace (the back one) because I decided it wasn't entirely necessary and it was in the way of the overflow box. The process of removing it has made me feel MUCH more confident about the ability for silicone to adhere to glass.
Actually, I removed a brace (the back one) because I decided it wasn't entirely necessary and it was in the way of the overflow box. The process of removing it has made me feel MUCH more confident about the ability for silicone to adhere to glass.
Tumbleweed
Guest
Looking good Erin.
Finish the DIY Controller for at least lighting, temp, pH, and salinity with data
logging over TCP and warnings sent to email and phone
Hey Erin,
Curious how you did this? Can you share?
[quote author=pixelpixi link=topic=4551.msg55448#msg55448 date=1221368382]
I've been treating my clownfish for ich using hyposalinity for about a week. I don't see any more signs of ich on the fish. I think that rather than treating them with hypo for a whole month I'll just put them in the clean QT tank and scrub down the old one. It seems like if ich is not on the fish and nothing else goes from the old QT tank to the new one then the ich will be gone. Is there anything wrong with that plan?
[/quote]
Hi Erin,
Here is some info for you on ich. One week QT seems short to me...
http://www.wetwebmedia.com/ichartmar.htm
Good luck and great tank!
[quote author=badbread link=topic=4551.msg60982#msg60982 date=1225089534]
Hey Erin,
Curious how you did this? Can you share?
[/quote]
I'm using the make controller board. (http://makezine.com/controller/) It has analog inputs, digitial inputs and outputs, as well as USB and ethernet ports. It's programmable in C and has a TCP/IP stack and convenient API for things like socket connections. It's a nice board for a lot of things and it's all open-sourcy and stuff.
Last I worked on it, I was having it handle controller functionality on the board and send UDP packets back to a computer for data logging.
Finish the DIY Controller for at least lighting, temp, pH, and salinity with data
logging over TCP and warnings sent to email and phone
Hey Erin,
Curious how you did this? Can you share?
[/quote]
I'm using the make controller board. (http://makezine.com/controller/) It has analog inputs, digitial inputs and outputs, as well as USB and ethernet ports. It's programmable in C and has a TCP/IP stack and convenient API for things like socket connections. It's a nice board for a lot of things and it's all open-sourcy and stuff.
Last I worked on it, I was having it handle controller functionality on the board and send UDP packets back to a computer for data logging.
[quote author=pixelpixi link=topic=4551.msg60895#msg60895 date=1224998060]
Nope. It was already braced.
Actually, I removed a brace (the back one) because I decided it wasn't entirely necessary and it was in the way of the overflow box. The process of removing it has made me feel MUCH more confident about the ability for silicone to adhere to glass.
[/quote]
Just wondering what make you think the brace is not needed? You saw what happen to Mike's tank right?? I would be worry without the brace though.
Made me think about drilling my 30G tank but I don't want to have the sump. The false wall takes so much space ..
..
Nope. It was already braced.
Actually, I removed a brace (the back one) because I decided it wasn't entirely necessary and it was in the way of the overflow box. The process of removing it has made me feel MUCH more confident about the ability for silicone to adhere to glass.
[/quote]
Just wondering what make you think the brace is not needed? You saw what happen to Mike's tank right?? I would be worry without the brace though.
Made me think about drilling my 30G tank but I don't want to have the sump. The false wall takes so much space
[quote author=Elite link=topic=4551.msg61018#msg61018 date=1225126366]
Just wondering what make you think the brace is not needed?
[/quote]
Hope.
That, and the fact that it's half inch glass and most glass tanks of this size don't have this much bracing. I left the side and front braces and the side braces attach to the back as well. I think it'll be okay. *fingers crossed*
Oh...
I didn't realize the tank was already braced and you took one of them out. You may want to consider putting it back in.
I know the standard 65g tanks 36x18x24 have a middle plastic brace that runs the depth of the tank. If it was removed and then "euro-braced" there is probably a good reason why it was done so.
Fwiw - 58g 36x18x21 doesn't have a brace of any kind - don't know why though.
sfsuphysics
Supporting Member
Take it from me, be careful about removing braces 
However if that brace was along the back wall, and you have space behind your tank, you can put the brace on the outside of the tank, which is essentially what I did with mine when I put my overflow along the back of my tank, it acted as one long brace.
However if that brace was along the back wall, and you have space behind your tank, you can put the brace on the outside of the tank, which is essentially what I did with mine when I put my overflow along the back of my tank, it acted as one long brace.
I set up the tank today. So far no leaks! (fingers remain crossed)
Since I have to move the office tank this week, I decided the best thing would be to set up the new home tank and move everything from the office tank to the home tank. That way I can take my time figuring out how I want to set things up in the office. Unfortunately, that means I had to set it up before doing some refinishing, painting, and repair work I wanted to do, but I can always take it down and do that once the office tank is set up again.
The overflow is working great. It's almost completely silent and the shadow from the box hides the pipes nicely. I'm using a return pump that's bigger than I plan to end up with. Having a good margin there is reassuring.
The ballast is a bit noisy. It's an old magnetic ballast and it's got a fairly strong hum. I think I'll probably replace it with an icecap before long. The Iwasaki 6500K bulb is too white (no surprise there) but I'm going to try adding actinic VHO supplementals before switching it out.
Right now the tank just has tap water in it. I'll let it run for a day, make sure everything is alright, then fill 'er up with some ocean juice!
Tumbleweed
Guest
Cool Erin. I think setting it up so that you can move your live stock to your home and take your time setting up your office tank is a good idea.
There happens to be a coat closet right behind my aquarium. Clearly it needs to be converted into an equipment room!
So far, this is what I have done:
I put one sump under the aquarium that receives water from the overflow and is connect to a second sump in the closet. The sump in the closet pumps back into the sump under the aquarium. The skimmer is in the coat closet sump.
Here's what I have planned:
- Reservoirs for two part above sump with dosing pumps.
- Reservoirs above that for top off and for mixing salt water. Float valve for top off.
- Big reservoir above that with a float valve, connected to the RO/DI unit.
I think this will work and will make top off and water changes a breeze. I tried to design it so that it's reasonably fail safe. There's a drain from the RO/DI reservoir above the level of the float valve that will go into the crawl space in case the float valve fails. The salt water and top off water reservoirs are filled manually by opening their respective ball valve.
Anything I'm missing or suggestions on what I should change? The one other thing I can think of is adding a "proper" drain so I can drain waste salt water into it. Unfortunately, the floor of the closet is concrete, so I don't think that will be feasible.
